[read_meter]
Today, I will walk you through my task management setup based on Google Calendar and Roam Research.
I explained previously in Time Management how managing tasks in a calendar is beneficial because it forces us to face the inevitable truth about how much time we’ll need to get to the bottom of our task list. Consequently, it will help us prioritize our tasks and ultimately increase our impact.
Unfortunately, too many people still use a to-do list on which all tasks are represented equally regardless of their complexity.
The primary reason is that no single tool offers that option.
- You can allocate time to your tasks in your calendar, but calendars are terrible at sorting what’s been completed or not.
- You can use an integration like Tasks in Google calendar, but all tasks have the same size.
- Proper task management requires rail guards to ensure nothing falls between the cracks.
- To achieve that, one must connect multiple tools to each other and get them to communicate correctly.
Luckily, Google Calendar and Roam Research are very easy to integrate, and their complementary sets of features make such a solution possible.
Here’s how to step by step:
Step 1: You need a Google Calendar
As far as I know, this is the only integration available with Roam. It’s also probably the most popular calendar solution and is free to use with any Gmail address.
I created a couple of demo calendars to illustrate this tutorial. They are inspired by mine.

- You can visualize them in any browser without an account:
- You can add them to your Google Calendar for a better view:
You will notice that these demo calendars are using the time blocking technique I described in Time Management, but while that works really well with this method, it is absolutely not a requirement.
Step 2: You need a Roam Research graph.
If you are a Roam user, you can use one of your graphs.
If not, I created a demo graph so you can see the system at work. It might be helpful even if you already use Roam to double-check any detail:
- Demo Roam graph: TaskManagerTemplate_by_p3ob7o
You should be able to access it in read-only mode. If when you open you do not see a dark vertical sidebar on the left, please click on the small button at the top left, represented by three horizontal lines.

You should then see something like this:

Step 3: Now, we install the necessary extensions in Roam
We need to add three Javascript extensions to the Roam Research graph:
- The RoamJS Marketplace: this will make installing the other two a breeze.
- The Google Calendar extension will make the connection to and data import from the calendar possible.
- The SmartBlocks extension: with this, we can automate the daily import from the calendar and manage overdue, unscheduled, and upcoming tasks.
Let’s walk together through that one step at a time. First, you need to have your Roam graph in a browser window or the Roam desktop app.
3.1 Let’s install the RoamJS Marketplace:
- Open this page in a new browser window.
- Click on the blue COPY EXTENSION button. That will place the code in your clipboard, ready to be pasted.
- Now go to your Roam Graph and paste the code you copied anywhere on a page, then click outside the block of text you just pasted.
- You should now see something like this:
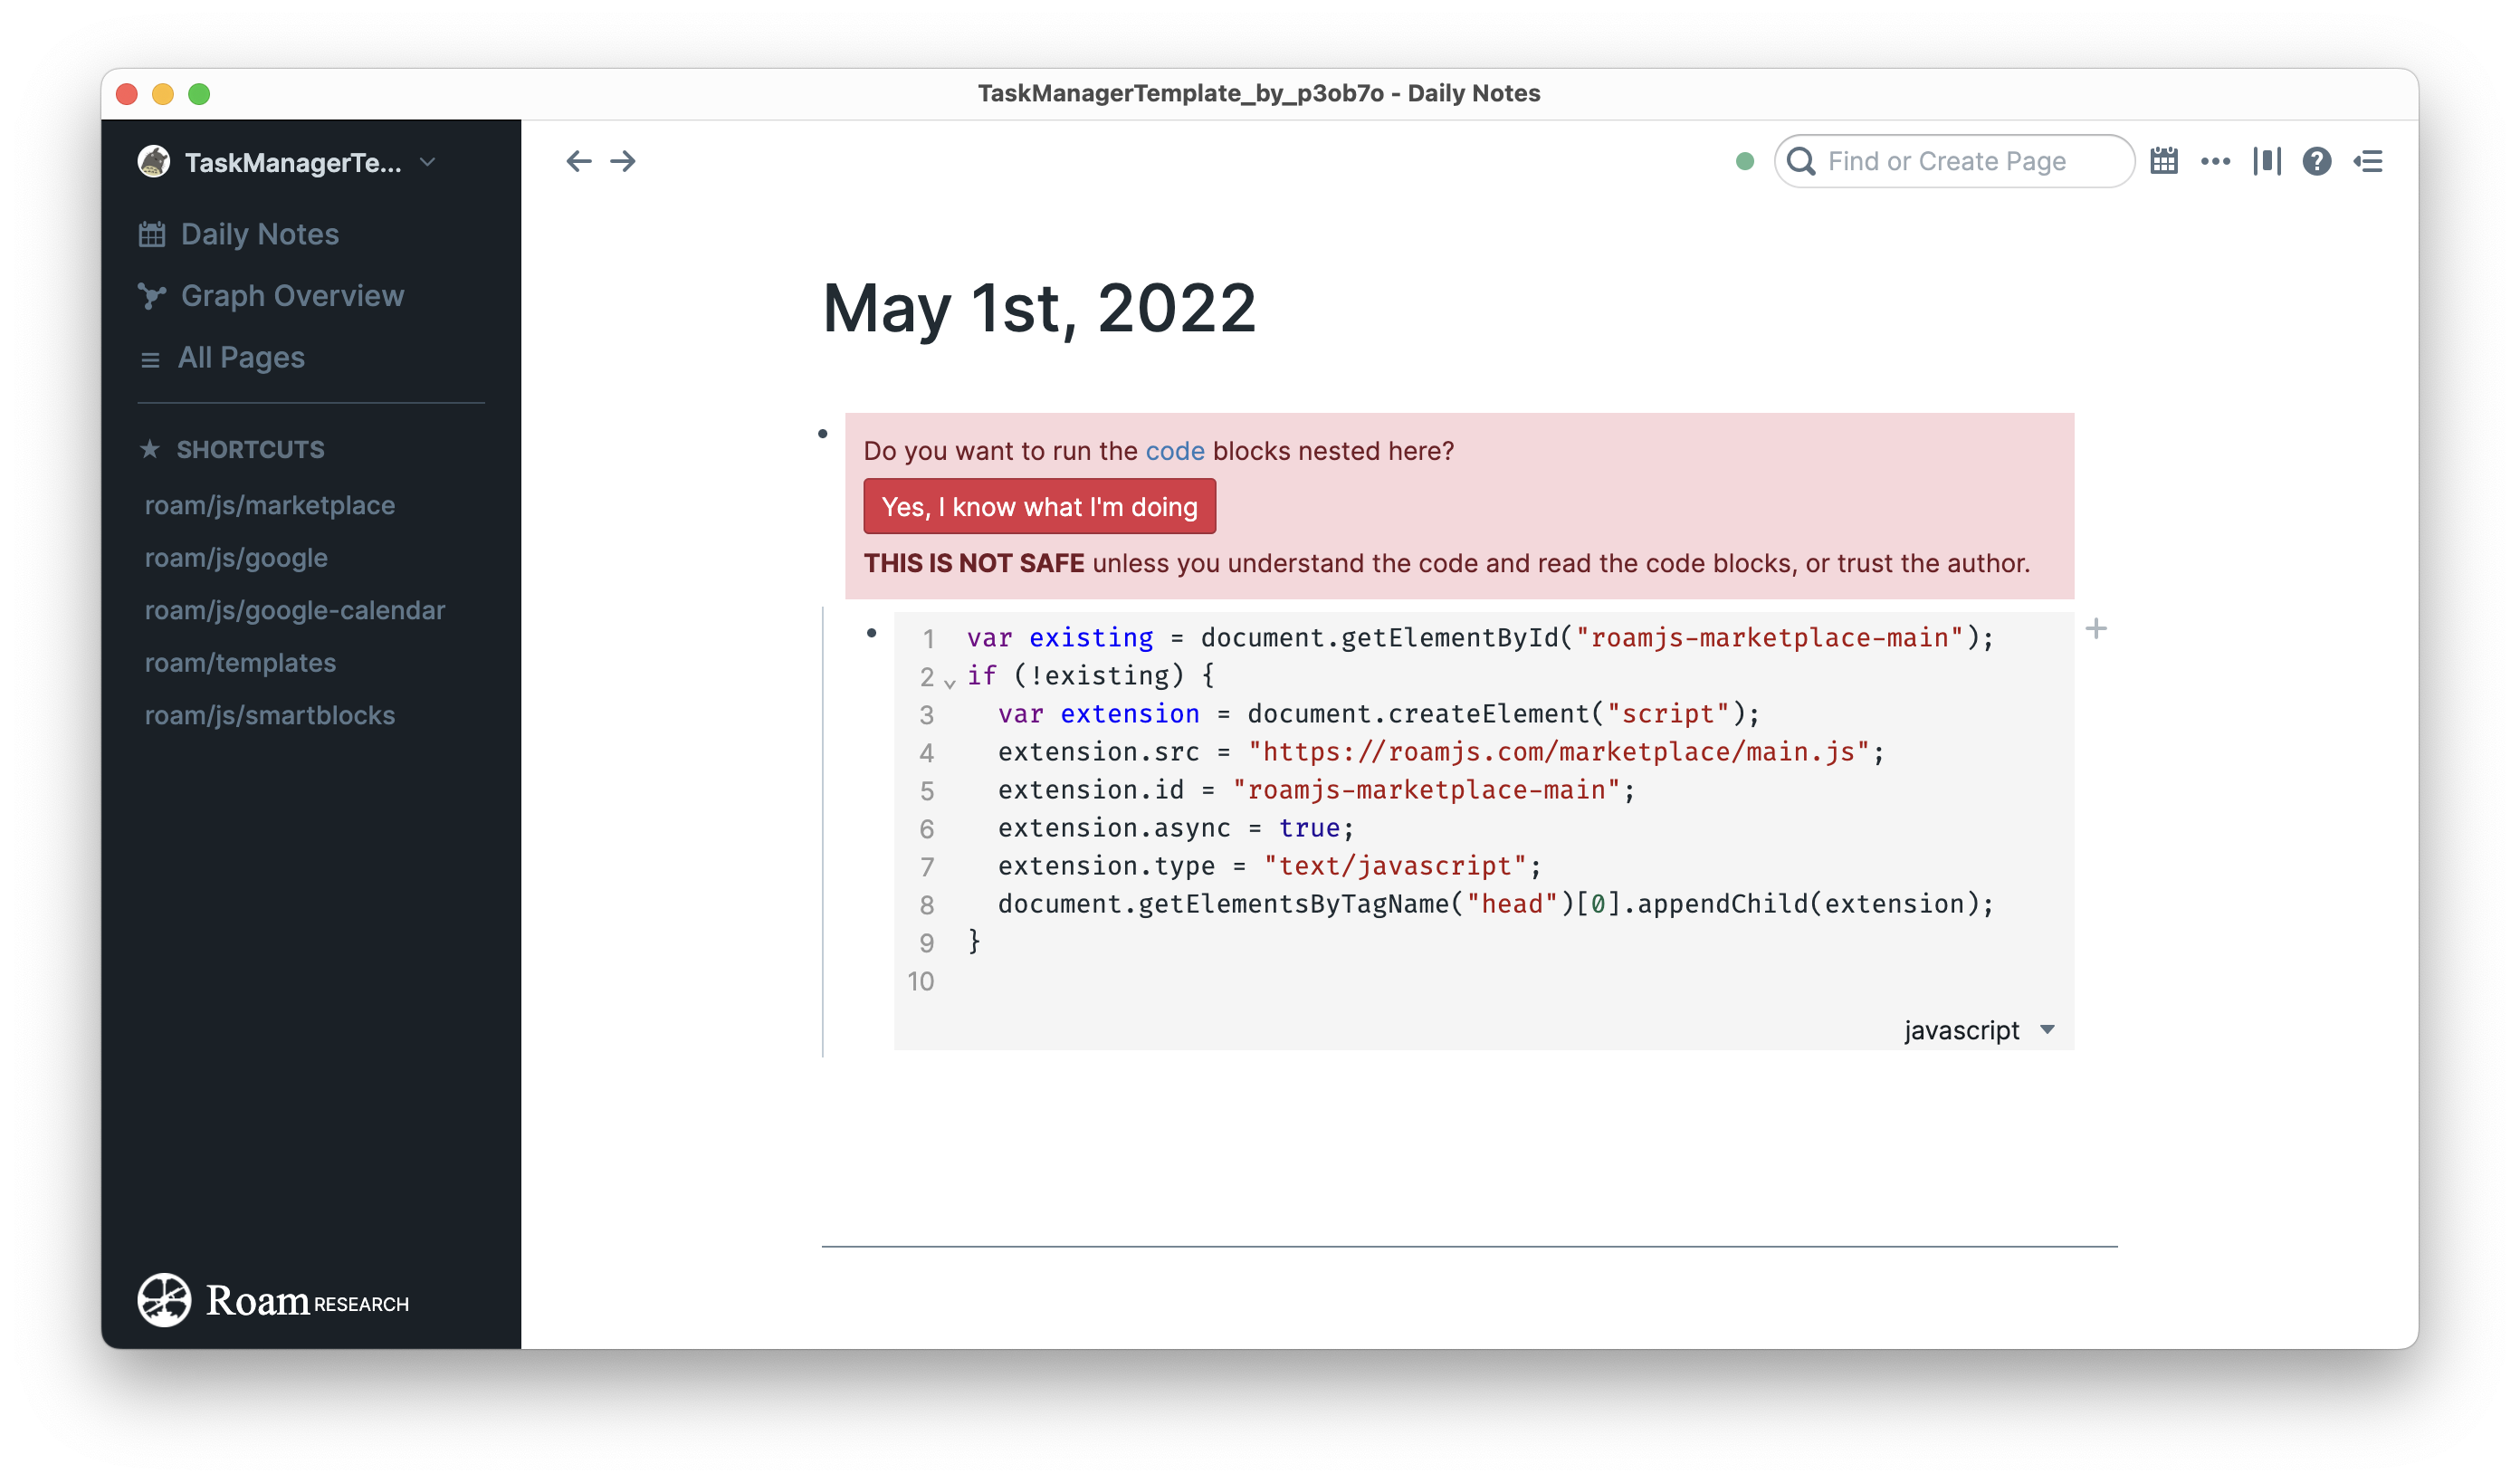
- Click on
Yes, I know what I'm doingto activate the RoamJS Marketplace, you should see this:

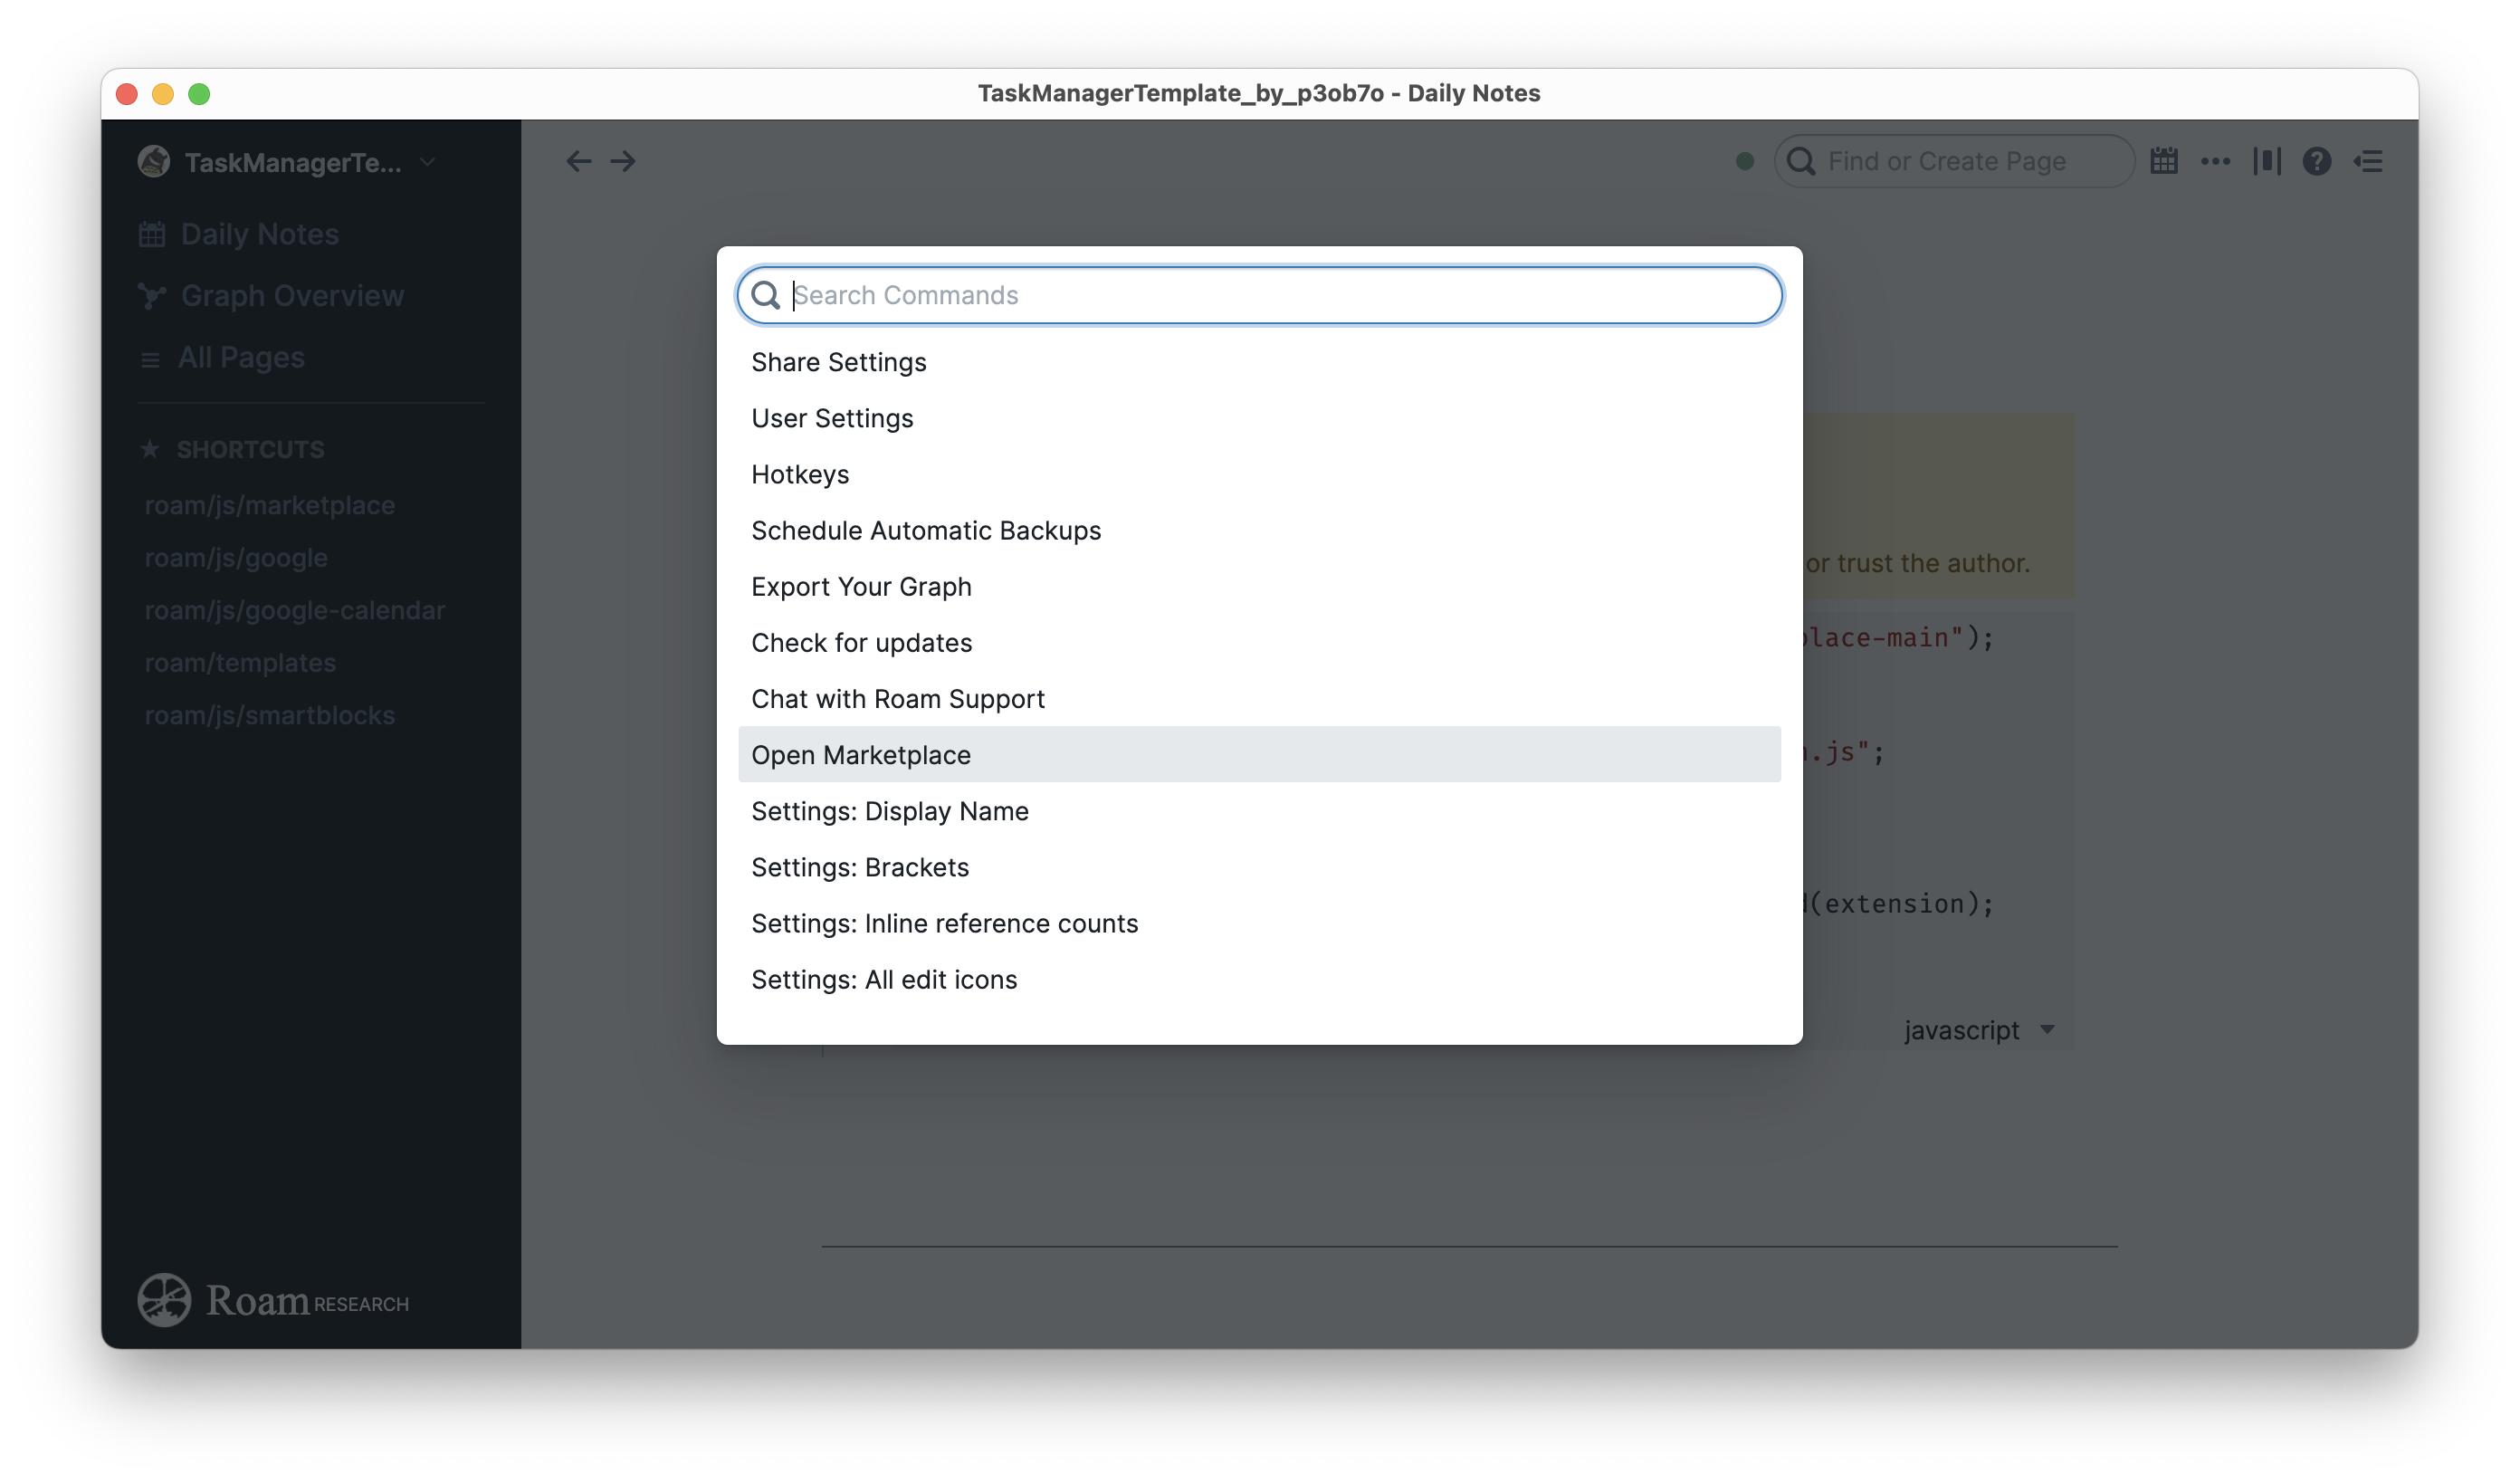
- To access the Marketplace hit
⌘-P(Ctrl-Pon Windows). - You’ll see the command palette open. Find
Open Marketplaceand select it.
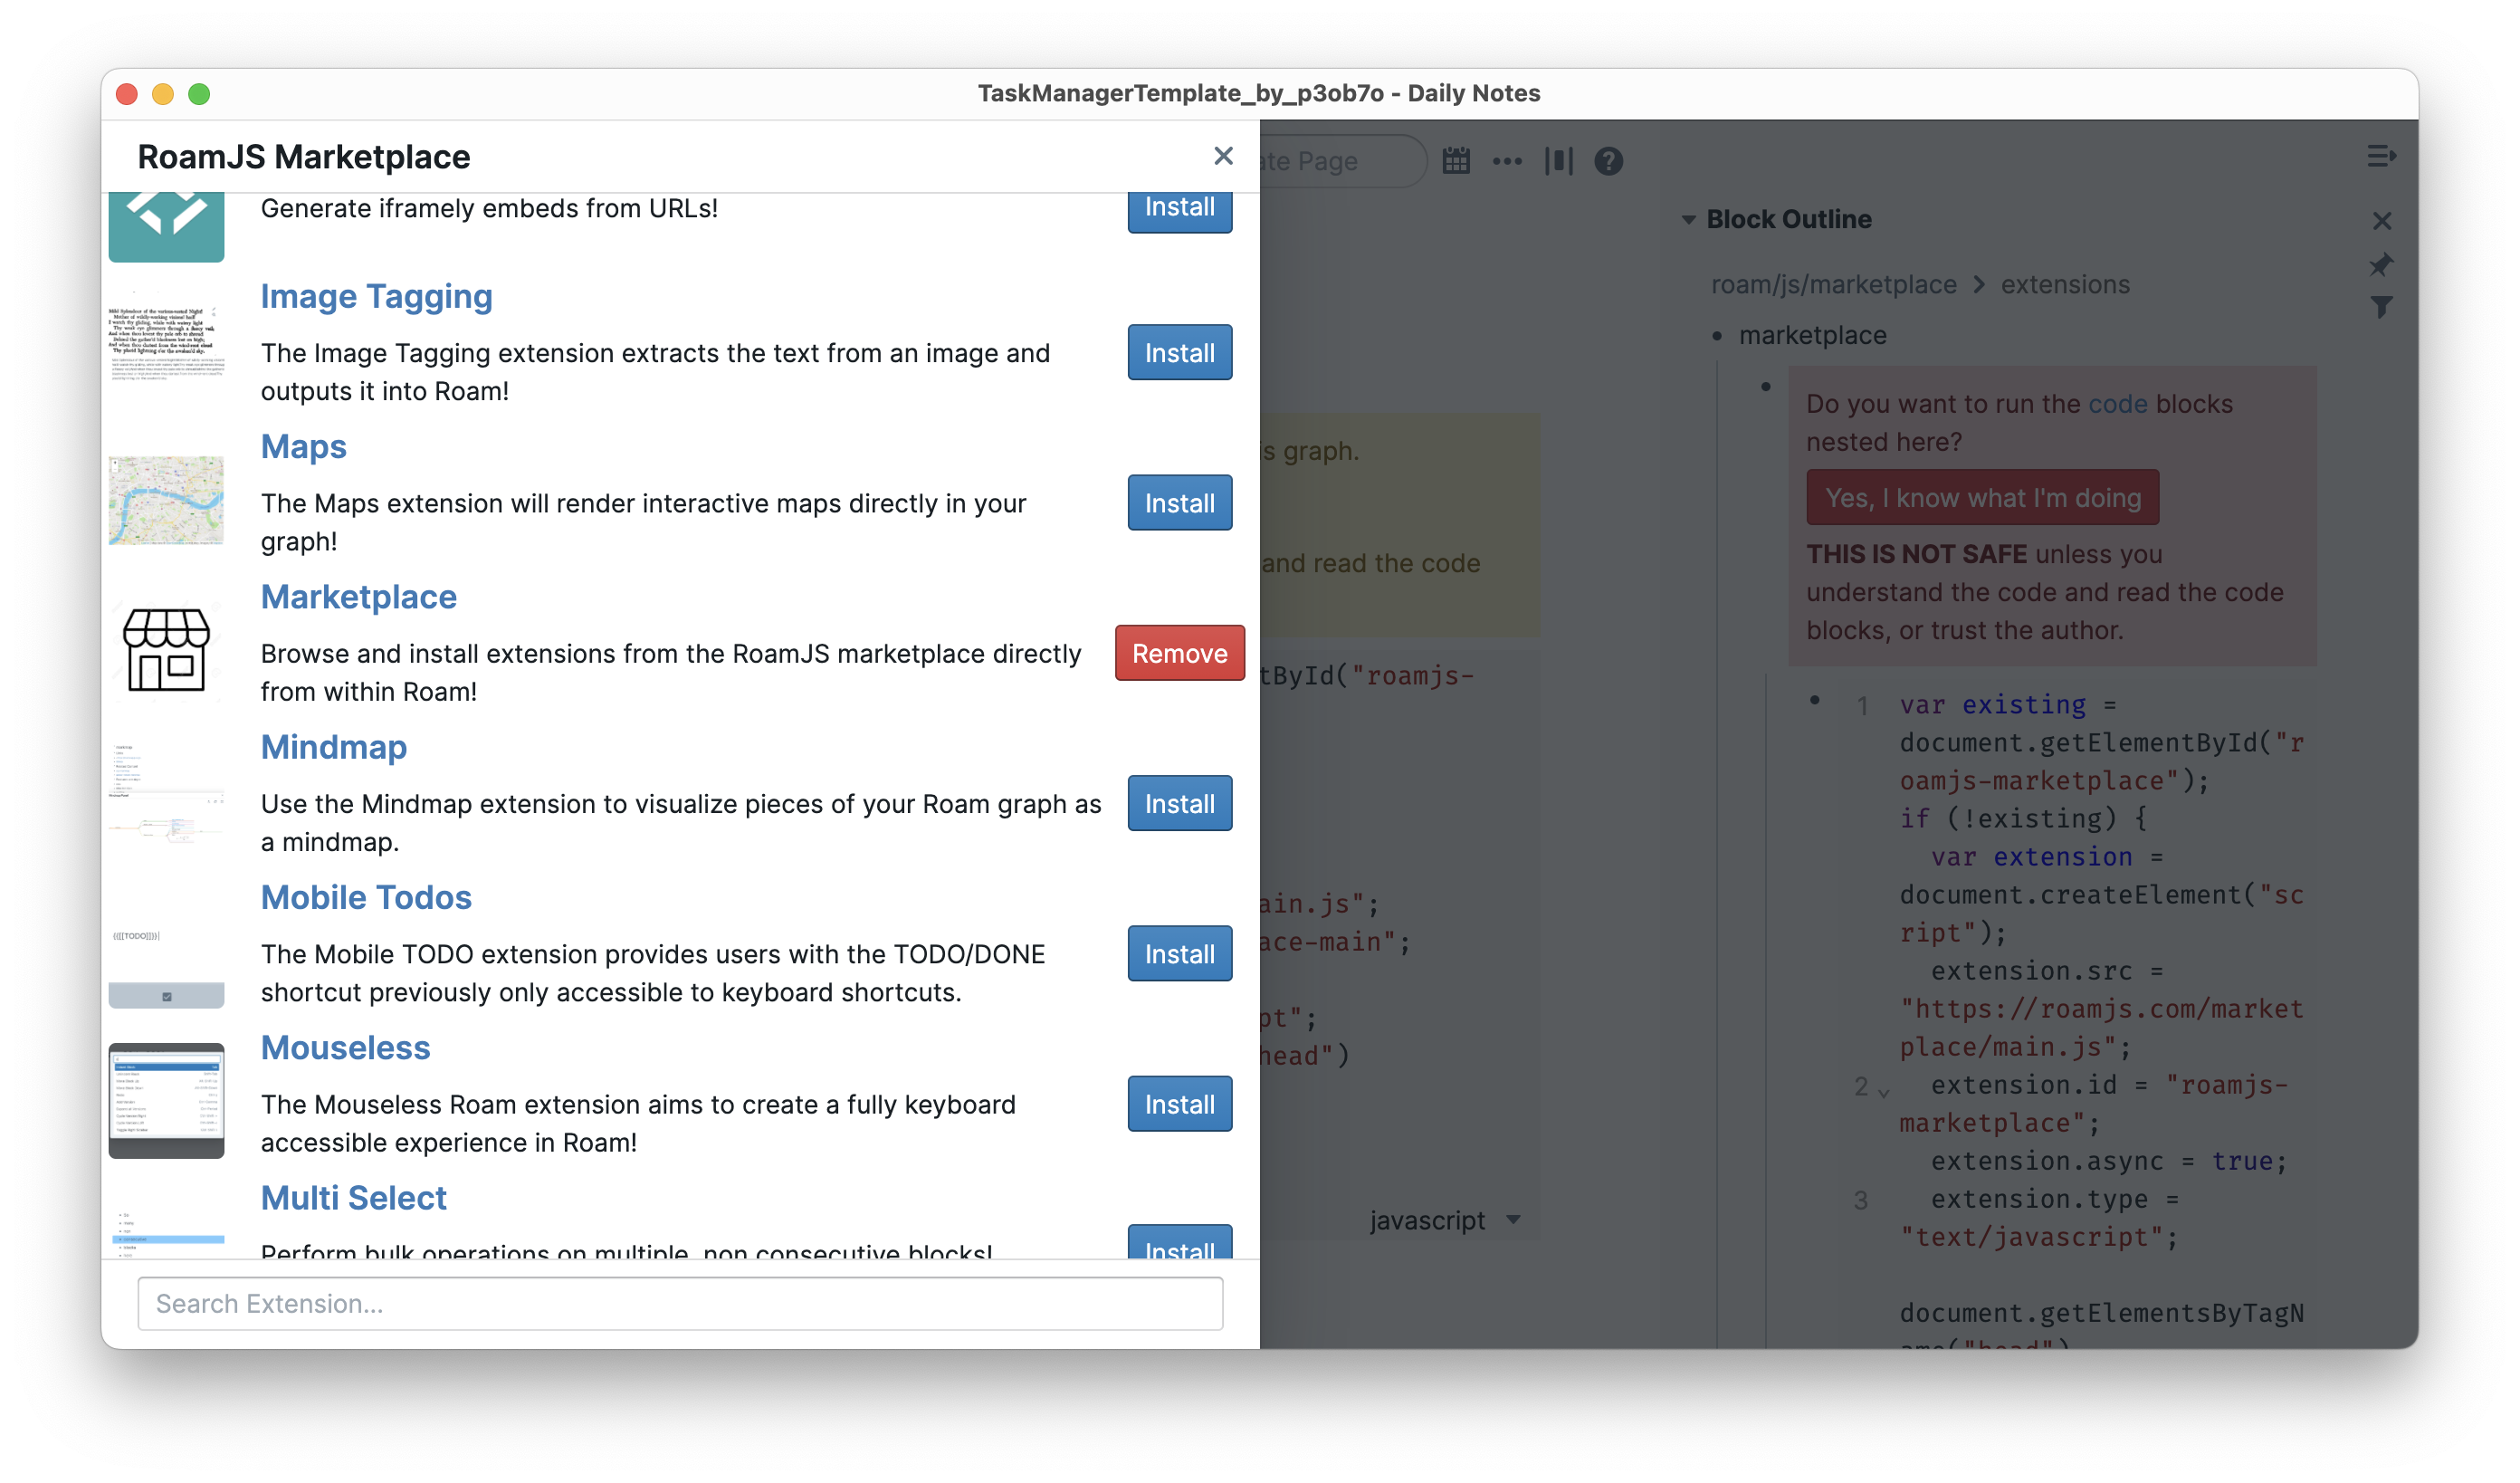
- You’ll see the Marketplace sidebar open:

- Scroll down until you find the
Marketplaceextension. And click onInstall.
While this step seems a bit redundant, it guarantees that the Marketplace extension is installed in the proper location (the[[roam/js/marketplace]]page), along with all future extensions you will install.

- When that is done, you’ll see another
Yes, I know what I'm doingbutton, please click on it.
- At this point, you can decide to delete the original code you had pasted early on, but you can also leave it. It’s up to you.
We are almost done with the extensions. Please just hit ⌘-P again and select Open Marketplace once more, then locate the Google Calendar and the SmartBlocks extensions in the list.


- Click
Installfor both. Each time remember to also activate the code by clicking on theYes, I know what I'm doingbutton.
That’s it, well done! The installation part is finished; now, we can move to the configuration.
Step 4: Let’s connect Roam to your calendar.
All the following steps happen in your Roam graph.
The Google Calendar extension will have created two pages.
- The first one is
[[roam/js/google]]open it.
It should look like this:

- Click on the
Login with Googlelink and follow the usual steps, giving Roam access to your calendar along the way. - The page should now look like this:

- The second one is
[[roam/js/google/calendar]]open it.
It should look like this:

- Type your Google Calendar ID in the input box in the middle, then click on the + button on its right.
If you only have one calendar tied to the Google account you authenticated, the Calendar ID is generally the email address your calendar is linked to; in my example, it is p3ob7o@gmail.com.
If you have more than one, you need to get the ID from your calendar settings in theIntegrate calendarsection.
- In my example, here is what the configuration screen looks like after adding the two calendars I linked earlier:

You can, of course, play with all the other settings as you wish, but here are the ones I use:
Include Event Link: disabled.
This adds a link to the event that allows you to open it in the calendar and enables event creation from within Roam. I don’t use either, and it messes up my formatting, so I keep it disabled.- Skip Free: enabled.
Any calendar event that you marked as Free is not imported. This is useful to me as I have calendar events I am not participating in just for informational purposes, and I don’t want those to be imported into Roam. Format:{start:HH:mm}: [[{summary}]]
This shows each event as a time on a 24h clock and the event name. The brackets create a page in Roam for the event. This is great for recurring events, as their notes will all be linked from one single page in Roam.Filter:^((?!#).)*$
Filters out any even with a name starting with#. This is a trick I use because I have events in my calendar where I want to be seen as busy but don’t want to be imported in Roam, like lunches, family, or personal time.Add Todo: enabled.
This adds a Todo checkbox in front of each event. It is crucial in managing events that were not completed, as we’ll see in a minute.
Step 5: let’s automate the daily import.
We are almost there! 🙂
It’s time to create a SmartBlocks template.
- Go to the page
[[roam/templates]]or create it if you don’t have one yet.
(technically, templates can go anywhere, but I like to organize them there).
Once again, you can play with the SmartBlocks commands, but here’s the template I use for my calendar import:
#SmartBlock !Day<%CURSOR%>---[[Diary]]<%GOOGLECALENDAR%>
OVERDUE<%TODOOVERDUE:99,(({uid}))%>
UPCOMING<%TODOFUTUREDNP:99,(({uid}))%>
UNSCHEDULED<%TODOUNDATED:99,(({uid}))%>
Let’s walk together through this template.
- The first line
#SmartBlock !Dayopens the template, declares it as a SmartBlock template, and names it!Day - The second line
<%CURSOR%>tells SmartBlocks where to place the cursor after using the template. We’ll see why in a minute. - Then we have a horizontal separation line.
- Followed by the
[[Diary]]section. This is practical because the Diary page will collect every event imported for reference.
We now enter into the core of the system… - <%GOOGLECALENDAR%> triggers the data import from the calendar(s), following the settings defined in the previous step.
- <%TODOOVERDUE:99,(({uid}))%> will list uncompleted tasks with a date in the past. In other words, this is what catches any task I had planned to complete but couldn’t.
- <%TODOFUTUREDNP:99,(({uid}))%> lists all tasks with a date in the future. The calendar import is only performed daily, so future calendar events do not appear here. Only tasks I have added manually across my Roam notes with future dates will be listed.
<%TODOUNDATED:99,(({uid}))%>will collect any task I marked as Todo in Roam that does not have a date.
Now that we have a template set, it’s time for the last step!
Automating the import every night.
- Go to the
[[roam/js/smartblocks]]page.
It should look like this:

You can play with the settings in the Home section if you wish, but I leave them to the default values. The section we are interested in is Daily.


I like running it just after midnight so that I always have my calendar events when I go to the daily notes page for the day.
That’s it! If you have followed these five steps, your Roam graph is now connected to your Google Calendar, and your events are imported every night into your Daily Notes.
Let’s see how this works in practice.
Here’s a day in the demo calendar:

And the same day, in the demo Roam graph:

Here six events were imported into the Diary.
We see that the events starting with # were ignored.
As the day went by and I marked Done the ones that were done, I also took a few notes during the meetings. I can do that simply inline in the Diary.
I couldn’t get to that task I had scheduled for 13.00, which I noted in my Daily Review. For some reason, I couldn’t reschedule it immediately.
UPCOMING lists a task for May 8 that I noted earlier on a separate page.
UNSCHEDULED lists a task I noted somewhere else, but without setting a date.
Let’s now move to May 2nd, one weekend later, in the calendar:

And in Roam:

As you can see, the day’s events were imported, but the item not completed on Apr 29th is now automatically listed in the OVERDUE section.
The Daily and Weekly reviews
Once set, the system works without much maintenance from a technical perspective. It just works.
Whenever I realize I need to do something, all I have to do is add a Todo checkbox to the corresponding note in Roam. If the task has a deadline, I can note it; if not, it’ll appear in UNSCHEDULED
Every week, generally on Sunday, I take 30 minutes to assign slots in my calendar to the tasks in UNSCHEDULED, UPCOMING, and OVERDUE that I want to get done over the following week. I also decide whether the tasks I can’t get to can be delegated, wait, or should be deleted.
Each task added to the calendar can then be instantly marked as Done in Roam, as the calendar import will bring it back at the right time.
Every evening I look at the uncompleted tasks (if any) of the day and decide whether they need to be rescheduled immediately or can wait for the following weekly review.
If I reschedule them immediately, I add them to the calendar and mark them done in Roam. However, if they can wait for the following review, I simply leave them there.
That’s all. With this simple system, I guarantee that the tasks I consider priorities have time allocated, that I correctly estimate what I can do in a week, and that no task will fall between the cracks.
I realize this was long, I hope it was clear enough, but I’d love to hear from you if not. I also wondered if this should be a video instead of a post. Let me know what you think of it.
Finally, if you want more of this content, subscribe to Morfternight, my weekly newsletter just below, or follow me on Twitter: @p3ob7o.
Leave a Reply to suggested reads for June 19, 2022 – /home/kOoLiNuS Cancel reply